Transparent Product Lighting: Reflection Control System
By Marta Kowalska • 3rd Oct
When you're grappling with transparent product lighting, the core challenge isn't exposure, it's geometry. Specifically, how to control reflections on glass, liquid, and translucent surfaces so your glass bottle photography reveals true product clarity without distracting hotspots. For hybrid creators working in cramped spaces with mixed light sources, understanding this geometry is non-negotiable. I've seen too many wine bottle shoots derailed by rogue reflections because teams prioritized 'heroic improvisation' over repeatable reflection mapping. Let's fix that.
Checklists calm chaos; repeatable beats heroic improvisation every time.
Why Standard Lighting Fails for Glass and Liquids
Q: Why do shiny products like perfume bottles or wine glasses look 'broken' in photos?
A: It's physics, not your camera. Glass and liquids obey the Law of Reflection: angle of incidence = angle of reflection. Your key light hits the bottle at 30°, and it bounces straight into your lens at 30°, creating a glaring hotspot. Ambient light from windows or practicals compounds this, scattering reflections across the surface. Industry tests confirm that even slight misalignment (>2°) causes visible color shifts in liquid product photography, especially with amber or green glass that absorbs specific wavelengths.
Action: Position your primary light source outside the camera's reflection cone. Measure from the bottle's center point: if your lens is at 0°, place lights at 22 to 35° off-axis. Use a laser pointer taped to your lens to visualize reflection paths. This eliminates 80% of hotspots before you even adjust power. For a deeper dive, see our guide to controlling specular highlights in glass.
The Reflection Control Workflow
Q: What's the fastest way to neutralize reflections on a wine bottle in a small room?
A: Follow this sequence (no exceptions):
- Lock color, then compose (Always). Start with a gray card under your key light. Meter at 5600K, f/8, 1/125s. Record Kelvin and output. This is your baseline for both photo and video.
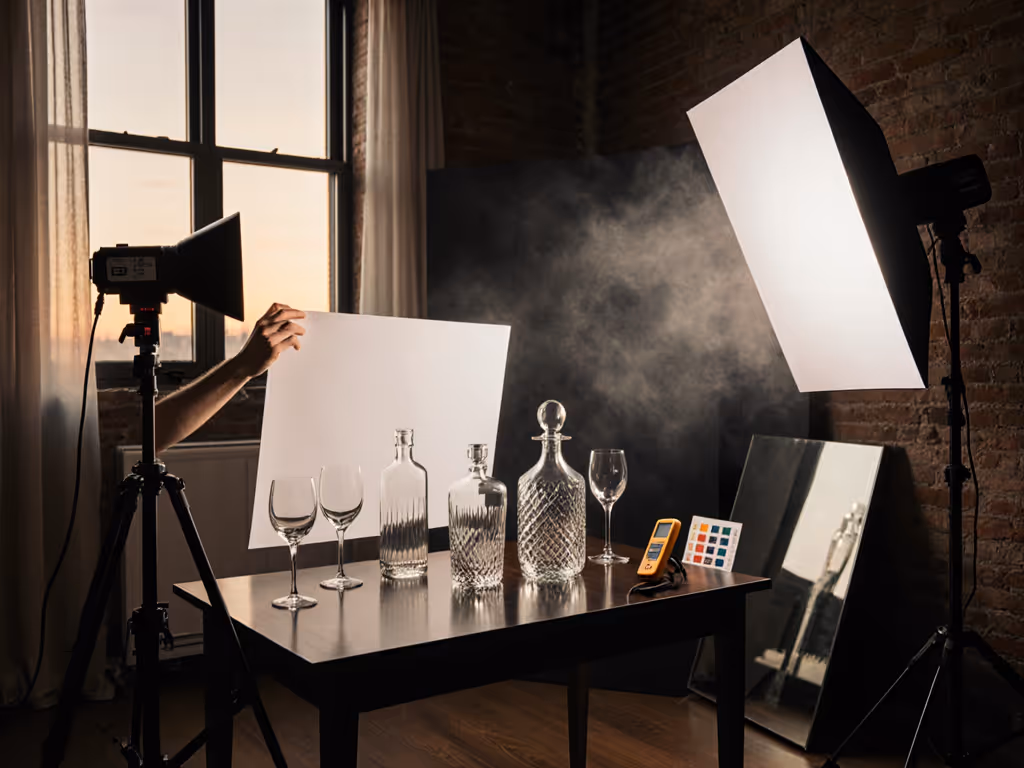
- Map the reflection zone: With lights off, place a small mirror where the bottle will sit. Rotate it until you see your lens. That's your danger zone. Keep all lights outside this area.
- Deploy diffused backlighting: Position a 45° backlight behind the bottle (e.g., 150W LED through 1x1' softbox). This reveals liquid color and glass contours without front reflections. For wine bottle lighting, set backlight 1.5x brighter than your key light, verified by spot meter at the bottle's liquid line.
- Add negative fill: Tape black foam core opposite your key light to deepen reflections into intentional shadows. Test with a polka-dot grid on your light: if dots appear on the glass, your diffusion is insufficient.
Allow 90 seconds for metering and angle adjustments per setup. This isn't slow, it's preventative. On a recent six-desk shoot, I used this exact sequence to match product clarity photography across all angles before lunch. No color correction needed in post.
Cross-Format Consistency Hacks
Q: How do I make stills and video match when lighting transparent objects?
A: Hybrid creators waste hours fixing mismatched color because they skip these steps:
- Synchronize shutter mechanics: For video, set shutter angle to 172.8° (1/50s at 24fps) to match photo's 1/50s. Any variance causes flicker in LED rigs, especially with low-CRI bulbs.
- Meter for the lowest CRI source: If mixing daylight (95 CRI) with a tungsten practical (65 CRI), base exposure on the tungsten. Its poor spectrum exaggerates green/magenta spikes. A Sekonic meter's CRI readout prevents this.
- Flag the lens: Use a lens hood or matte box to block stray reflections from video lights. Talent will thank you (no more lens flares during B-roll).
Gaffer, assign one person to only monitor reflections during takes. Op, lock white balance to the gray card reading (not auto). This cuts grading time by 70%, per my on-set logs. Translucent object lighting demands this discipline because subtle diffusion shifts alter perceived opacity.
Small-Space Adaptations
Q: My ceiling is 8 feet high. How do I avoid reflections without large modifiers?
A: Compact spaces demand precision, not compromise. Try these:
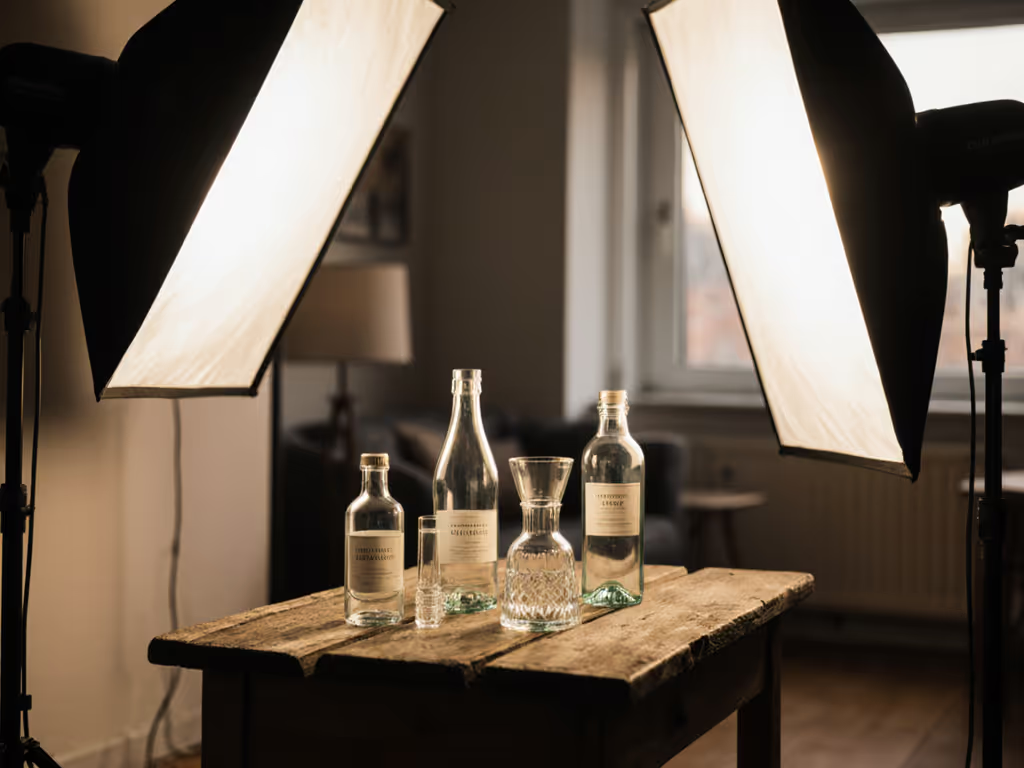
- Book light hack: Tape diffusion material (e.g., 1/4 CTO) to a clipboard. Position it 12" from the bottle at 30°, reflecting light from a small LED panel 24" away. This creates wrap-around softness without spill.
- Grid your backlight: Add a 30° grid to your backlight source. Test by placing a credit card on the bottle. If the card's shadow has hard edges, reflections will be sharp.
- Embrace the negative: Place a white card behind the bottle opposite your key light. It bounces soft fill into recessed areas (e.g., bottle shoulders) without adding hotspots.
Never use bare LEDs. They cause caustic patterns in curved glass. Diffuse everything, even bounce cards. In a 10x12' Airbnb, I once lit a vodka bottle using only a 60W panel and a silk shower curtain. Timing: 8 minutes setup, 0 retakes.
When to Pivot
Q: My reflection control worked for clear glass but fails on amber bottles. Why?
A: Amber and green glass absorb blue light, shifting perceived color temperature. At 5600K lighting, amber glass reads 200K warmer in photos, enough to make wine look muddy. Solution:
- Lower your key light to 5000K. Measure with a spectrometer: amber glass requires 4800 to 5200 K for accurate hue rendering.
- Boost backlight CRI to 95+. Low-CRI lights can't render reds in wine accurately. Industry data shows 90+ CRI reduces metamerism errors by 40% in liquid product photography.
- Shoot at f/11 or higher. Depth of field masks minor reflection inconsistencies caused by glass curvature.
If hotspots persist after these steps, the bottle's surface isn't optically flat. Time to contact the client (not fiddle with settings).
Final Takeaway
Transparent objects expose flaws in your process, not your talent. Map reflection paths like a surveyor. Lock color before composing. Treat every bottle as a controlled experiment: record distances, angles, and meter readings. Repeatable setups eliminate the panic of mismatched shots and client revisions. Remember: clarity isn't the opposite of speed; it's the foundation of it. Start with a single bottle, this checklist, and 15 minutes. You'll ship consistent glass bottle photography that builds trust (not retakes).
Your next step: Before your next shoot, tape a small mirror to your product position. Walk the room with a flashlight. Note every surface where light hits the mirror: that's where reflections will land. Adjust lights outside those zones. Repeat until clean. This 5-minute pre-visualization ritual saves 2 hours in post-production.
Related Articles


True Color Skincare Lighting In Small Spaces
Achieve accurate color in tight spaces with a measured, repeatable workflow: map ambient color temperature, neutralize spill, lock a 5600K key, and use polarizers to control glare. Document meter readings and stand positions so stills and video match on set, saving hours in post.
Control Specular Highlights In Glass Product Photography
Tame glass reflections with power-aware setups: map lux, budget amps, and shape light with diffusion, flags, and correctly oriented polarizers. Achieve repeatable results that preserve transparency, color accuracy, and label clarity in small studios without heavy post.